Frame
The Frame tool is for checking layouts against a grid of rows and columns or using the golden grid. You can overlay them on your designs and size them accordingly. It offers two modes of operation: Grid and Golden Grid.
You can cycle between these modes using the
`key.
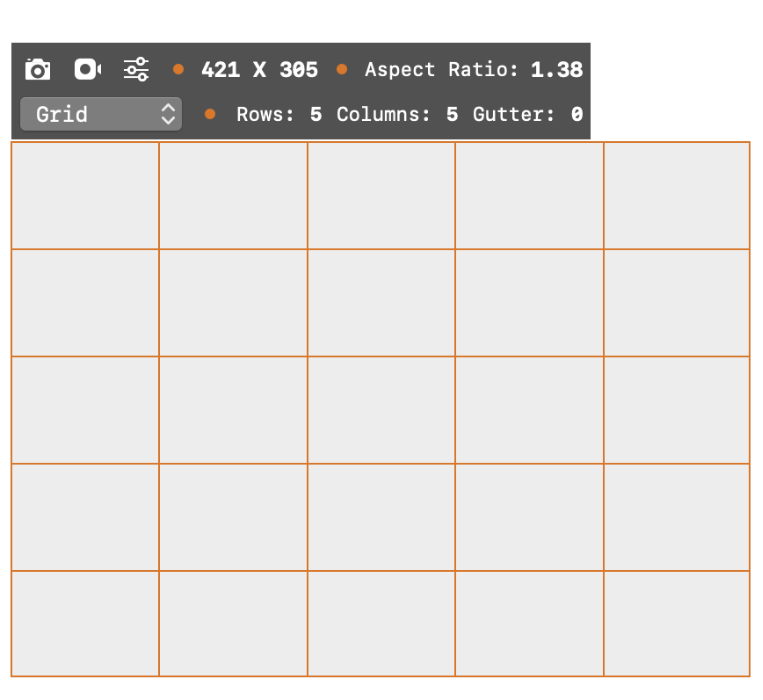
Table of Contents
- Grid mode
- Golden Grid mode
- Inactive state
- Presets
- Taking Screenshots
- Capturing Video
- Info window
- Moving the frame
- Sizing the frame
Grid mode
Grid mode is perfectly suited to check your layouts using rows and columns. As you size the frame, the rows and columns automatically adjust to the new dimensions. Use the below shortcuts to quickly add rows and columns:
=to add a column-to remove a columnOption=to add a rowOption-to remove a row
Grid always maintains equal-sized rows and columns.
The same actions can be performed using the Touch Bar, if you are using a MacBook that supports it.
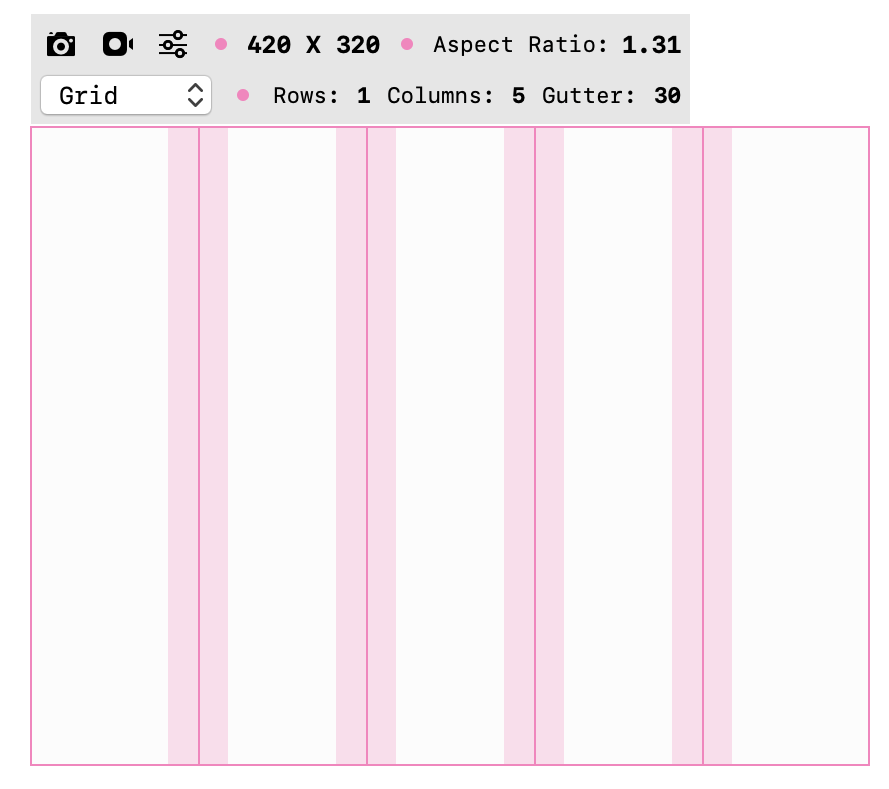
Gutters
In the Grid mode, you can also add gutters around a column. This is useful for layouts that have column gaps or paddings. Use
the [ key to decrease gutter width and ] to increase it.
Golden Grid mode
This mode is useful to check for good distribution of space and see how layouts use the Golden Grid ratio. You can use the spiral to orient around the 4 corners

Controlling the Spiral
Use the C key to rotate the spiral around the 4 corners. You can also increase and decrease the divisions using the shortcuts:
=to increase the divisions by 1-to decrease the divisions by 1
In this mode the aspect-ratio of the window is locked to the Golden Ratio (roughly 1.618). As you resize the window, the aspect-ratio is constrained and maintains the golden-ratio even when sizing using the keyboard shortcuts.
Inactive state
The Frame tool reacts to the active status of the App. If the focus moves to the background, it makes itself transparent to clicks, allowing you to interact with the underlying application. Move the focus back to QuickLens in order to change the size or the grid configuration.
You will know if the Frame is focused or in the background based on the color of the borders. If it has greyed out, it means it is in the background and will be transparent to clicks.
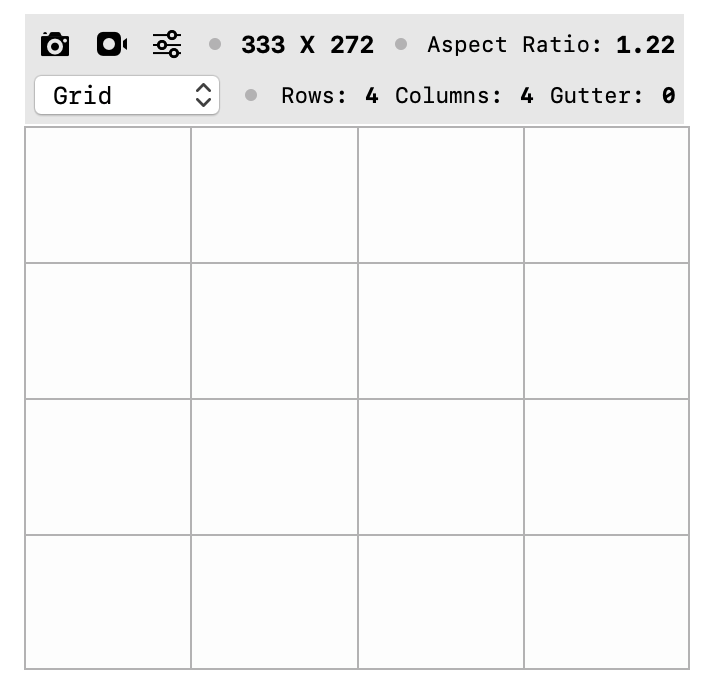
This applies to both the Grid and Golden Grid modes.
Presets
You can save your favorite Grid / Golden Grid configurations as a named preset. Custom presets are shown in their own category with a quick summary of the configuration.
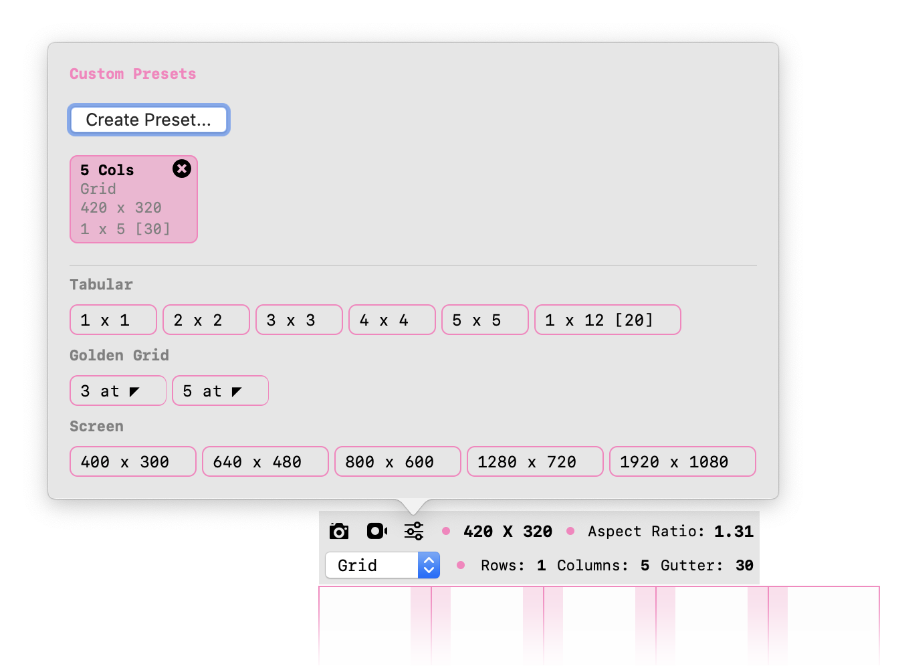
Applying presets
The Frame tool has some pre-built presets that are handy for some scenarios. Click on a preset to apply it immediately. These presets can affect the size of the frame and the grid configuration.
All of the presets are in the popup that opens on clicking the ![]() icon.
icon.
Creating custom presets
Create a new preset with the "Create Preset..." button. Give it a name that describes it well. You can click on it anytime to apply it immediately.
Taking Screenshots
Use the keyboard shortcut Command C to copy a snapshot
of the frame to the clipboard. It is copied as a PNG image that can be pasted in other apps. Note that the screenshot
will include the grid. If you want a clean screenshot use the 1 x 1 preset which excludes the rows and columns.
You can also click the ![]() icon to take a screenshot.
icon to take a screenshot.
Saving to a file
If you hold the
Option key while clicking on the icon, you will be able to save it to a file instead of clipboard. This is also possible
with the Option Command C shortcut.
Capturing Video
Click on the ![]() icon to start capturing a video immediately. It will capture everything within the frame for the video and the size of the video is the size of the frame. As the video is being recorded, you can see the elapsed time. Click on the
icon to start capturing a video immediately. It will capture everything within the frame for the video and the size of the video is the size of the frame. As the video is being recorded, you can see the elapsed time. Click on the ![]() icon to stop the video.
icon to stop the video.
Capture Directory
Note that all recordings are stored in a Capture Directory that can be specified in the Preferences. If you haven't selected a capture-directory, you will be asked to specify one before the recording begins.
Recording with options
If you hold the Option key when clicking on the ![]() icon, a panel
with the options is shown.
icon, a panel
with the options is shown.
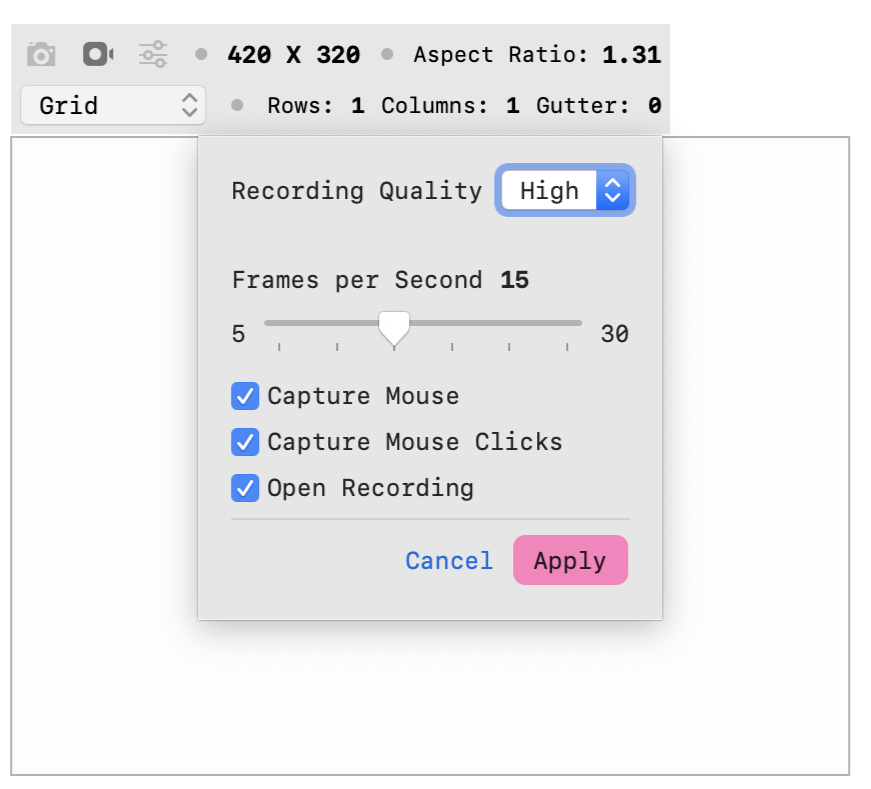
You can select options like the frame-rate, whether mouse and mouse-clicks should be included in the video and others.
Session only settings
These settings are kept as long as QuickLens is running and are not persisted across sessions. Once you restart, they revert back to the defaults that you see above.
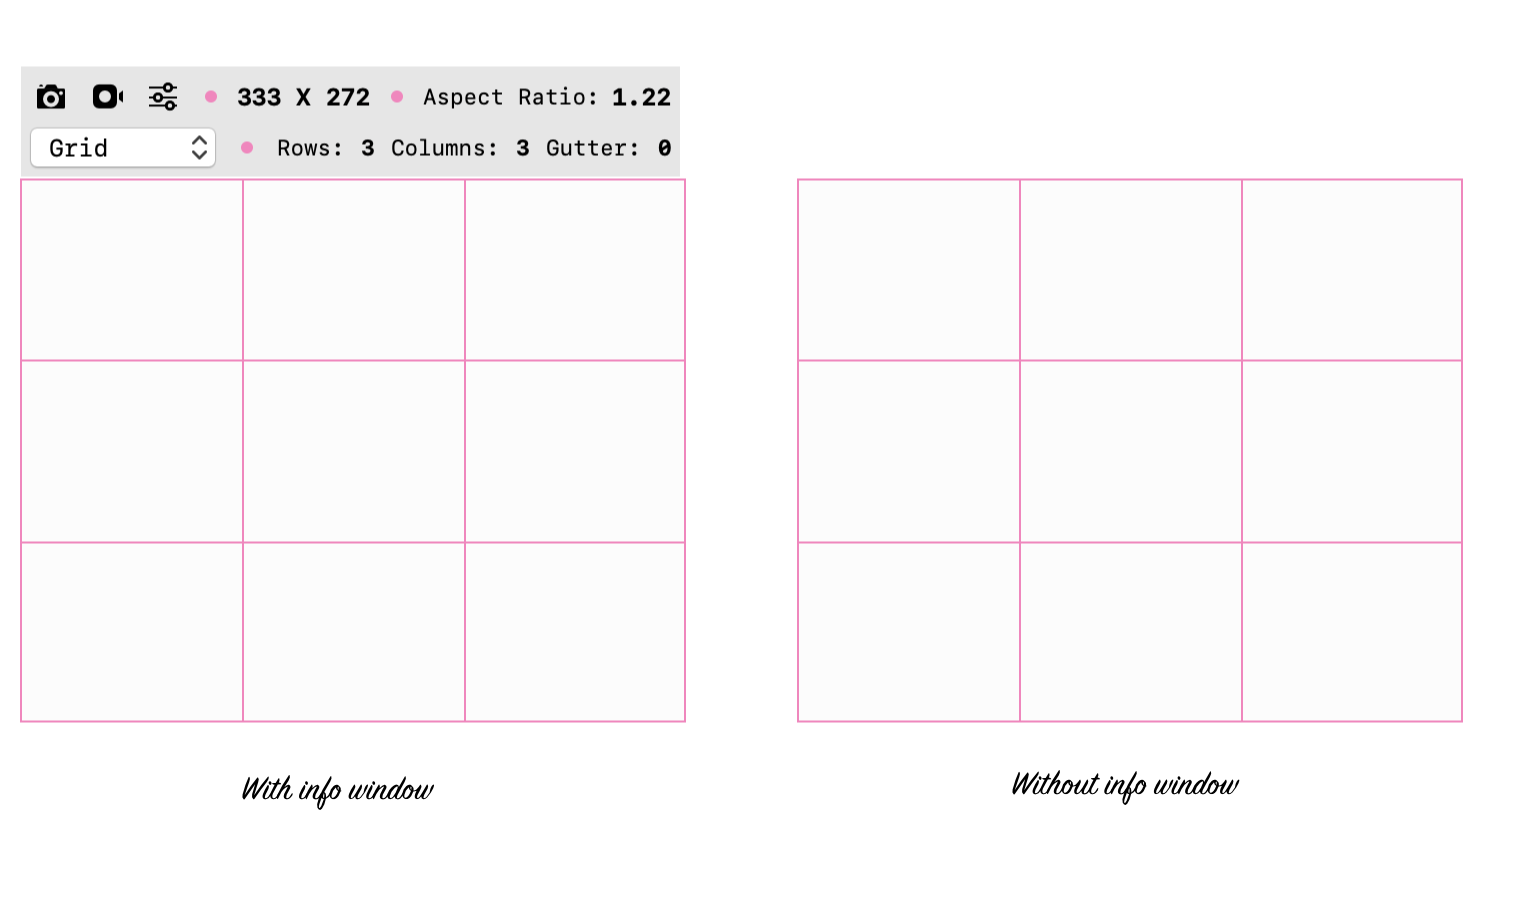
Info window
The info window gives you quick information about the frame and also has various controls for switching modes, presets, taking screenshots and capturing videos.
You can toggle the info window with the I key.
Moving the frame
Use the following keyboard shortcuts to move the frame:
←to move left by 1px→to move right by 1px↑to move up by 1px↓to move down by 1px
Hold the Shift key along with the above shortcuts to move by 10px instead.
Moving between monitors
The tool takes care of moving between monitors as you navigate at the edges of the screens.
Sizing the frame
Frame size can be changed like a regular window on the macOS. Use any of the sides to resize the frame. You can see the current size in the Info window.
There are also keyboard shortcuts for sizing the frame as shown below:
Command=to increase width by 1pxCommand-to decrease width by 1pxCommandOption=to increase height by 1pxCommandOption-to decrease height by 1px
Hold the Shift key increase or decrease by 10px.
You can also flip orientations of the frame by using the
Spacekey. This will help you see the frame in landscape and portrait modes.


- Copyright © 2021 PIXELINGENE LLC. All Rights Reserved.
- Terms of service • Privacy Policy
- Photoshop ® is registered trademark of Adobe Inc.
- Latest release build:
2.8.644