Lens
Lens is a powerful tool for zooming in close to the pixels of your desktop. It is perfect for picking colors and maintaining palettes, making precise measurements, simulating color-blindness or checking color contrast!
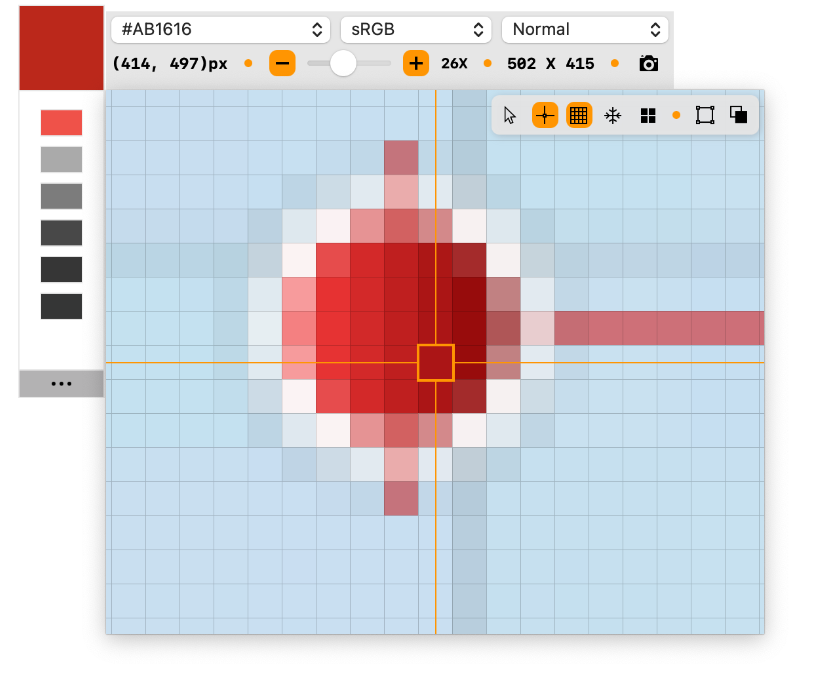
Table of Contents
- Zooming in
- Moving the center
- Retina pixels
- Color formats
- Color spaces
- Sampling Colors
- Color Palettes
- Simulating Color Blindness
- Info Window
- Controlling Display behavior
- Checking Color Contrast (aka Readability)
- Sizing the window
- Moving the Window
- Copying to Pasteboard
- Multiple instances
Zooming in
Lens supports zooming into the pixels from 1X to 64X. This gives you a real close up view of pixels to see if everything is coming out as expected, especially for those 16 x 16 icons that need to be pixel perfect :-).
Zooming is possible with the controls on the Info Window. You can also use the handy keyboard shortcuts to zoom in and out.
=to zoom in by 1X-to zoom out by 1XShift=to zoom in by 10XShift-to zoom out by 10X
If you have a Touch Bar on your MacBook, you can also use the zoom slider to zoom in and out.
Moving the center
The center pixel of the Lens window is the real focal point. The color shown in the palette view is the one in the center of the Lens window. The center is higlighted with the crosshair and lies in the middle of the pixel-grid.
The center pixel corresponds to the mouse location on the screen.
You can move the center with the mouse or through keyboard shortcuts:
←to move left by 1px→to move right by 1px↑to move up by 1px↓to move down by 1px
Hold the Shift key while pressing the arrow keys to move by 10px.
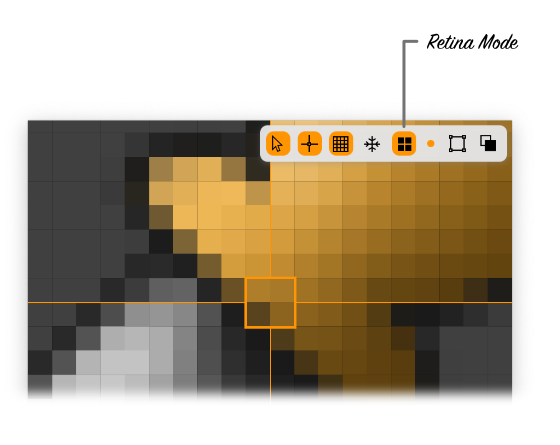
Retina pixels
Lens supports seeing the pixels in both Retina and non-Retina mode. Use the shortcut key: R to toggle the Retina behavior.
The retina sub-pixels are only visible on displays that support Retina mode. All recent MacBooks and iMacs have Retina displays.
The default behavior is to show pixels in non-Retina mode. This makes it easier to pick colors and you don't have to guess which sub-pixel was used for sampling the color. The picture below shows the difference between the two modes. Notice how the center pixel has more sub-pixels in the Retina mode.
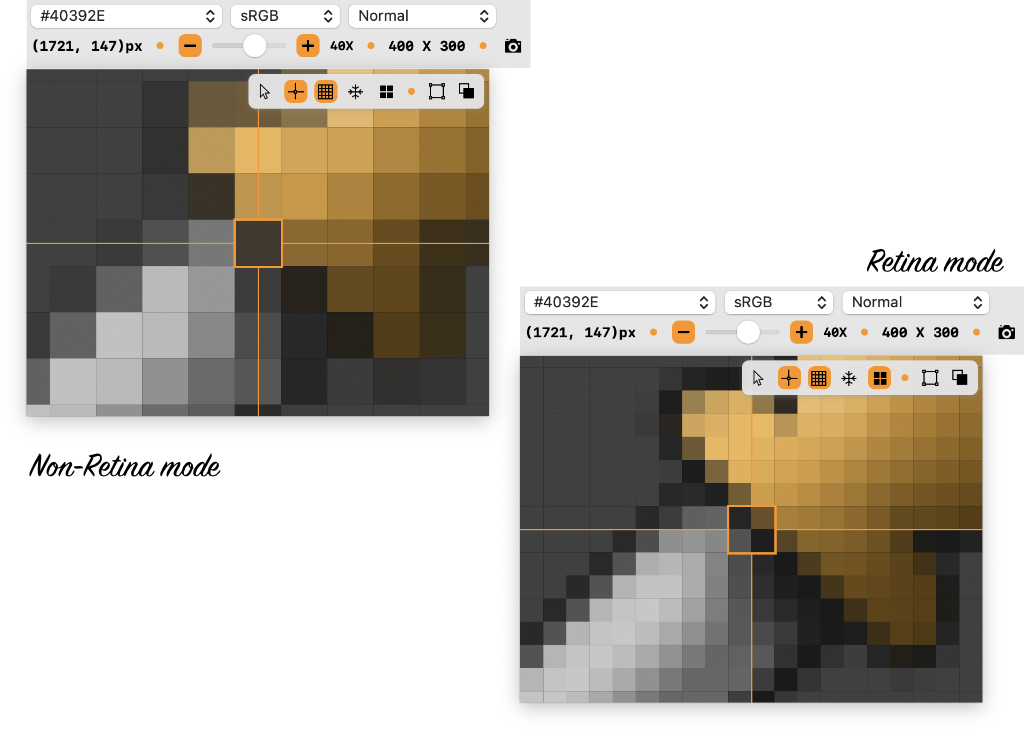
You can also toggle the Retina mode using the toolbar.
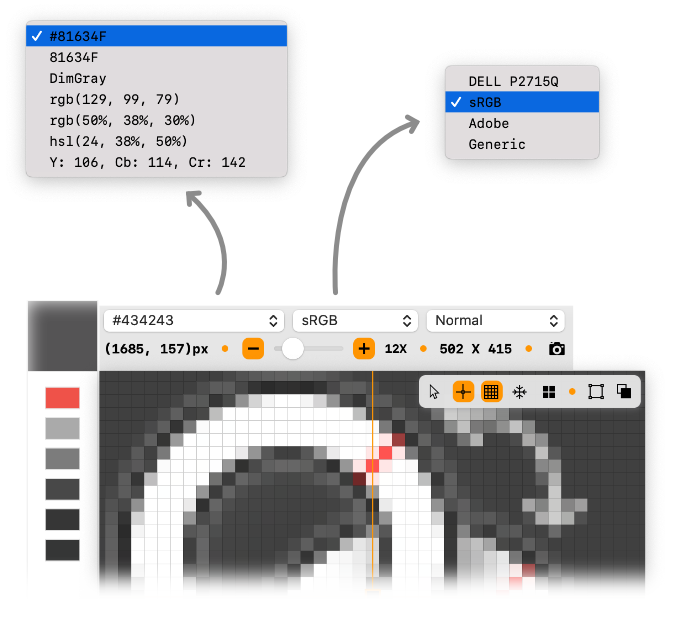
Color formats
Viewing the colors of your pixels is the next big feature of Lens. Since colors can be represented in various formats, the tool allows you to see it in all the popular formats: Hex, RGB, HSL, RGB Percent, HTML colors and even YCbCr.
Use the Shift C shortcut to switch between color formats. You can also choose from the select control in the Info Window.
As you move your mouse around the screen, the color under the center will be shown in the selected format.
Color spaces
Just like color formats, you can also switch between color spaces. There are 4 supported color spaces: Native Display (named according to the system profile of the Display), Adobe, Generic and sRGB. sRGB is the default as it is the most common color-space for UI and on-screen colors.
You can cycle between color spaces using the shortcut: Shift S. The select control on the info-window is also good for changing color spaces.
Sampling Colors
Just viewing colors is only half the fun. The other half is picking colors! You can do that with the C key and that puts the current color
into the palette. There is no limit to the number of colors you can add into the palette! Of course, as a good UX person, you would know that too many
colors is not a good thing :-).
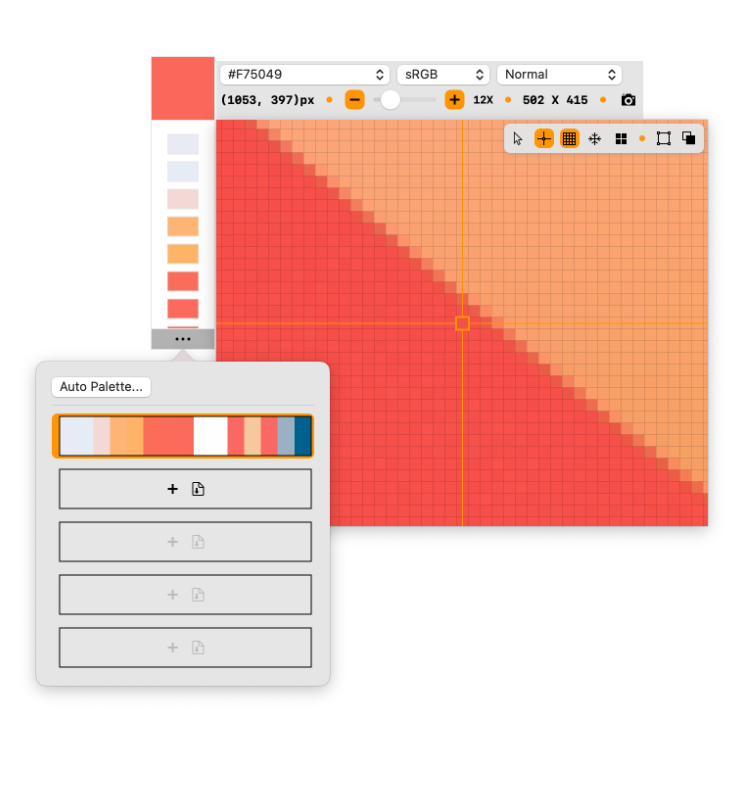
Auto Palette
You can pick individual colors with the C key but there is also an option to pick colors by selecting on an area on the Desktop. This style
of selection is called Auto Palette. It automatically does a histogram of the selected area and picks the top colors.
The colors collected by Auto Palette are inserted at the top of the current palette.
Invoke the Auto Palette with the shortcut: Option C. You can also pick from the palette popup, as shown in the video above.
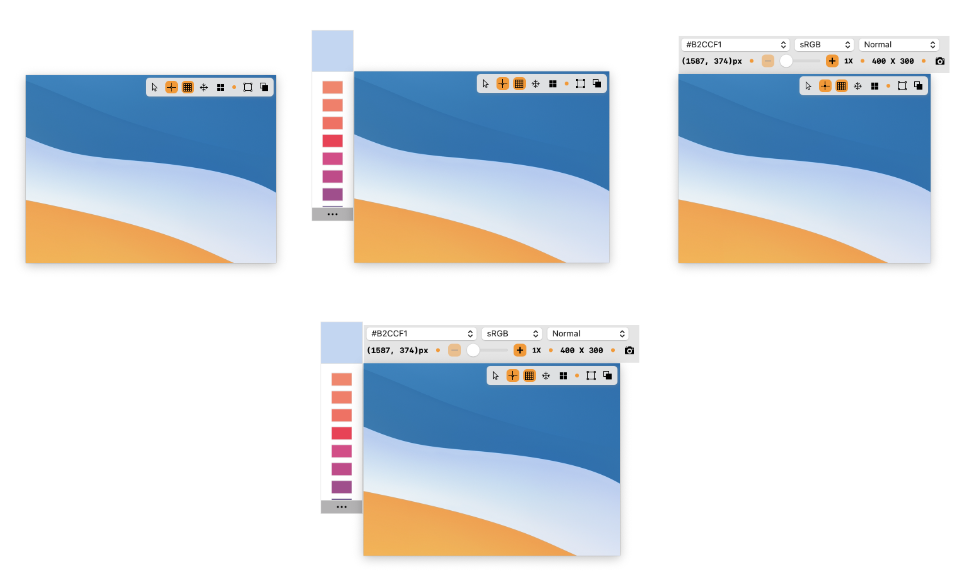
Color Palettes
The default palette always sits to the left of the Lens window. It shows the colors that you have picked so far. Of course, you are not limited to only that palette. You can create a new palette and use that to track more colors. Lens allows up to 5 color palettes.
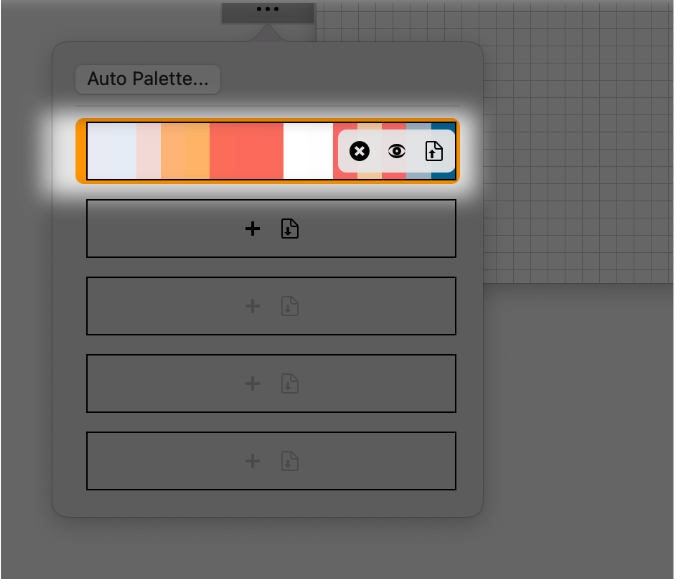
To create a new palette, click the ![]() on the color palette popup. The new palette
starts out empty.
on the color palette popup. The new palette
starts out empty.
Importing JSON
You can also create a new palette by importing a JSON file (*.json) containing colors. It has a specific format, which can be seen below:
{
  "source": "QuickLens",
  "colors": [
    {
      "g": 0.55294117647058827,
      "b": 0.34509803921568627,
      "r": 1
    },
    {
      "g": 1,
      "b": 1,
      "r": 1
    },
    {
      "g": 0.83137254901960789,
      "b": 0.83137254901960789,
      "r": 0.83137254901960789
    },
    {
      "b": 0.75686274509803919,
      "r": 0.67450980392156867,
      "g": 0.72549019607843135
    }
  ]
}
Use the ![]() icon button from the palette popup to import colors from a JSON file.
icon button from the palette popup to import colors from a JSON file.
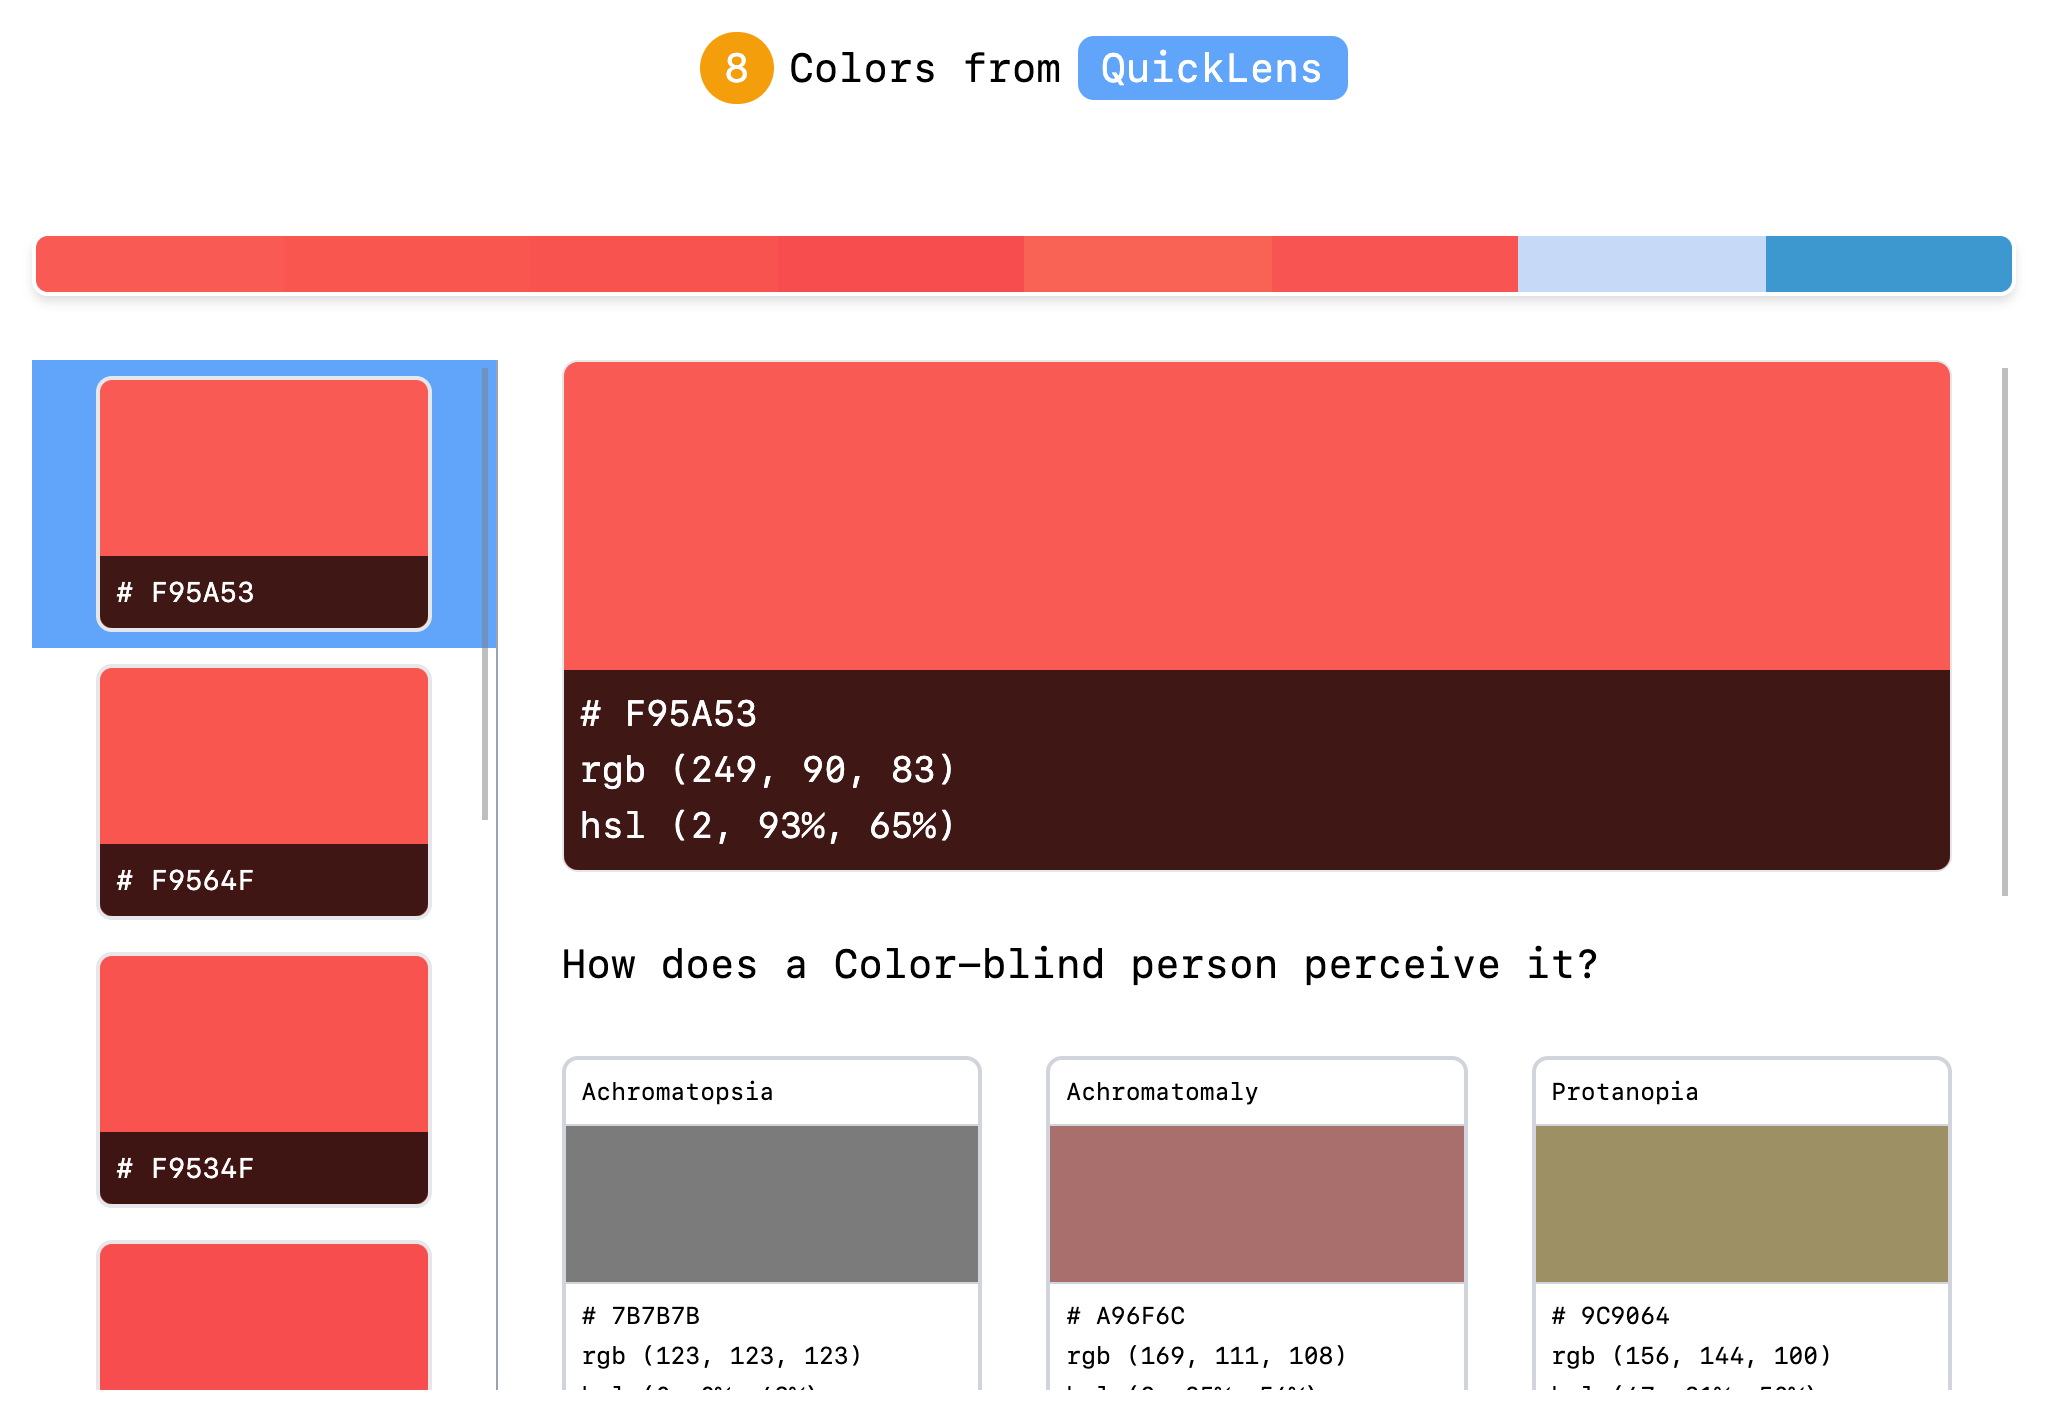
Preview HTML Color sheet
Once you have a palette that you like, it would be great to share with your fellow designers. QuickLens allows you to export
the palette as an HTML Color sheet. You can do this from the Palette popup by clicking on the ![]() icon.
icon.
The colors are shown as tiles in the color-sheet with all the popular formats. You can also see the color-blind values for each color.
Export as JSON
Color palettes can also be exported as JSON, in the same format as shown earlier. Use the ![]() icon from the palette popup to export to a location of your choice.
icon from the palette popup to export to a location of your choice.
Simulating Color Blindness
By simulating color-blindness, accessibility testing of interfaces becomes simpler. Choose from one of many color-blind conditions and simulate your interface in real-time. This allows you to test your colors for contrast and helps you identify the right hues for certain types of audience.
Below you can see the same view rendered in various color blind conditions.
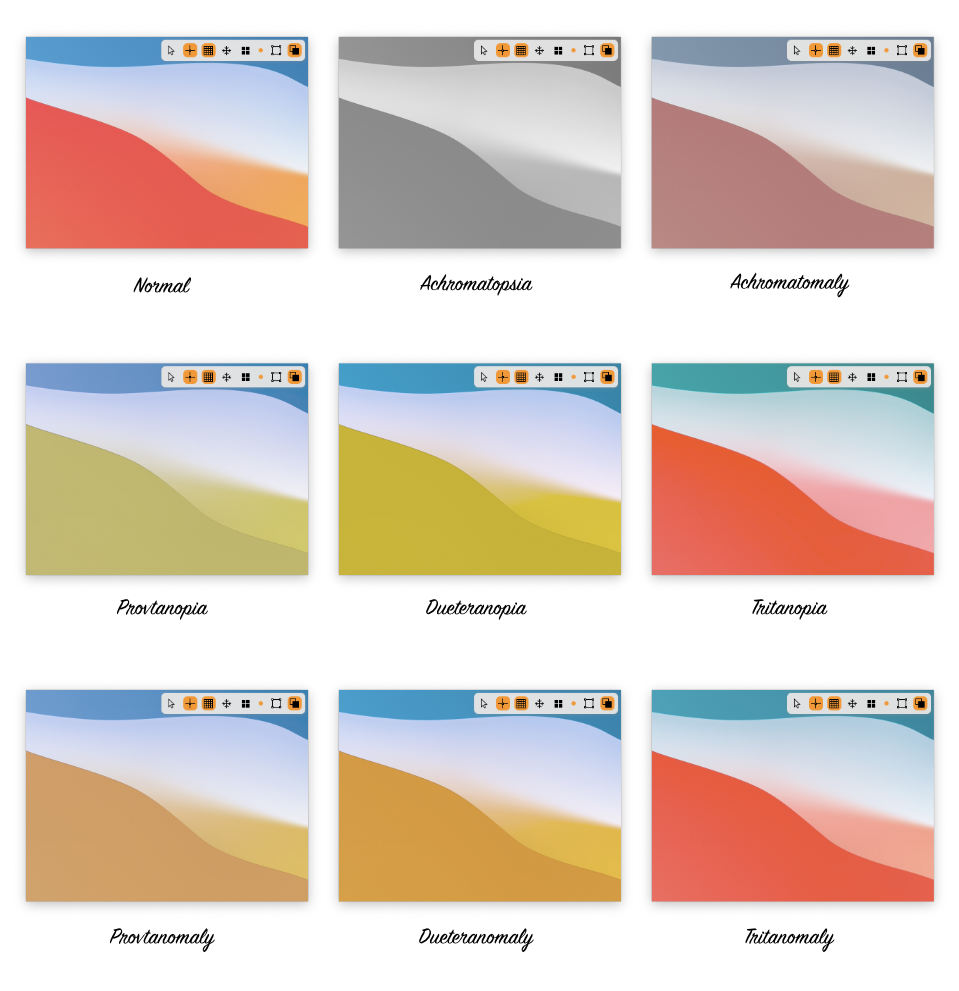
You can cycle between the color-blind conditions using the V key.
Info Window
Right above the Lens window is the Info window, that contains the controls for color-formats, color spaces, color-blindness and also some handy info about the location on the screen, zoom levels and size.
You can cycle between various overlay modes for the windows. Use the I key to toggle various windows.
You can be in the following modes:
- see only the Lens window
- Lens with Info window
- Lens with Color palette
- Lens with both Info and Color palette
Controlling Display behavior
The toolbar inside the Lens window controls various display behaviors. You can use keyboard shortcuts or just the buttons on the toolbar.
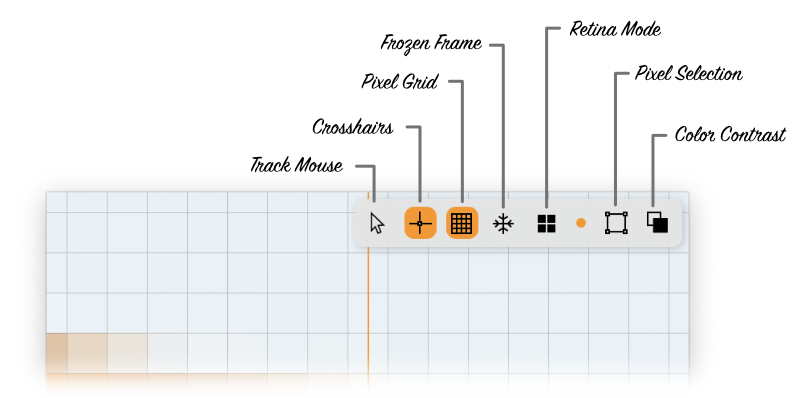
Tracking Mouse
By default, the center of the Lens moves with the mouse. Sometimes it is better to disable mouse-tracking, in order to focus on an area.
Use the M key or the ![]() icon on the Lens toolbar to toggle mouse-tracking.
icon on the Lens toolbar to toggle mouse-tracking.
Crosshairs
The crosshair highlights the center pixel, which is the focal point of the Lens.
Toggle the crosshair with the H key or using the ![]() icon on the Lens toolbar.
icon on the Lens toolbar.
Pixel Grid
The pixel grid enhances the display of pixels and shows the zoomed-in pixels more clearly.
Toggle the pixel grid with the G key or using the ![]() icon on the toolbar.
icon on the toolbar.
Note that the Pixel Grid and the Crosshair are only visible at 4X zoom and above.
Frozen frame
Freezing the current frame seen in the Lens lets you focus on the captured image. This is useful in cases where you don't want to lose a particular frame. In this mode, you cannot apply certain actions like zooming or moving the center. The frozen behavior is not persisted, so if you close the window and reopen, you are back to an un-frozen state.
Use the F key to toggle the frozen frame behavior or use the ![]() icon on the Lens toolbar.
icon on the Lens toolbar.
Pixel precise measurements
Some elements on the screen are so small that it is much better to get up close and then measure them. This is exactly what the
selection tool allows you to do. Select the ![]() on the toolbar in the Lens window to activate pixel selection.
on the toolbar in the Lens window to activate pixel selection.
You can now select a rectangle around the area, resize it to just fit the required boundary and then see its measurement on the top-left of the Lens window. As you zoom in and out, the selected size will adjust to the zoom-level, so you know where you are on the Desktop.
You can see all this shown in the video below.
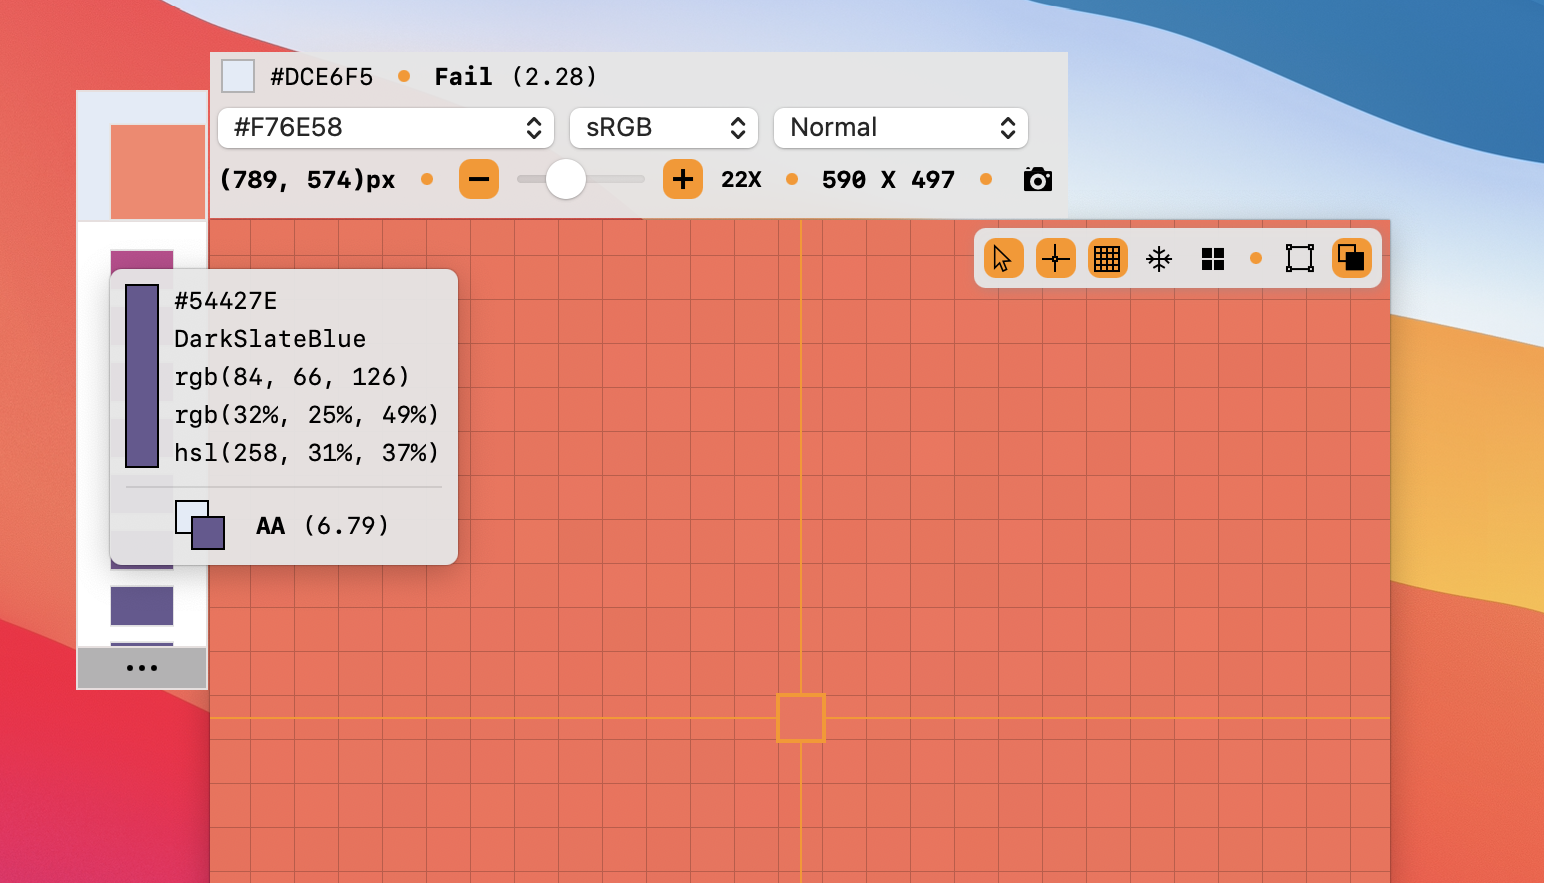
Checking Color Contrast (aka Readability)
Lens allows you to test the color contrast between foreground and background colors in real-time.
You can toggle this using the ![]() icon or with the
icon or with the T key.
Background color
Enabling this mode shows the Color Contrast on the Info Window and also adds the option to see and change the background color.
You can set a different background color using the B key. This will set the currently active color
(shown in the center of Lens) as your background. All contrast measurements will now be done using this background color.
The foreground color is the active color at the center.
Contrast Measurements
The contrast is indicated using the standard WCAG guidelines.
- AAA: best contrast of text against the background
- AA: good contrast for normal text (14pt and below)
- AA+: good contrast for large text (18pt and above)
- Fail: not enough contrast
Tooltips
The contrast values can also be seen in the tooltips for the colors in the palette. This gives you a live contrast against the selected background, as seen in the picture below.
Sizing the window
You can size the window precisely with the following keyboard shortcuts:
Command=to increase width by 1XCommand-to decrease width by 1XCommandOption=to increase height by 1XCommandOption-to decrease height by 1X
Hold the Shift key as well to resize by 10px
Moving the Window
The Lens window can be moved by the standard Click + Drag gesture. There are also keyboard shortcuts for the same:
Command←to move left by 1pxCommand→to move right by 1pxCommand↑to move up by 1pxCommand↓to move down by 1px
Hold the Shift key as well to move by 10px.
Copying to Pasteboard
You can take a snapshot of what you see in the Lens window and copy it to the pasteboard.
Copying color
Use the Command C to copy the current color to pasteboard. It will be copied in the selected format.
Copying screenshot
Use the Command P shortcut to copy snapshot to the pasteboard. The copied image can be pasted as an image in other applications.
Multiple instances
Lens can have upto 2 instances open. This is purely to make comparisons across monitors. Originally it was built so Lens
could be used to test itself for precise rendering. Use the keyboard shortcut Command 1 to open more instances.
You can also do this by holding the Option key while clicking on the lens icon-button in the Tool Palette.


- Copyright © 2021 PIXELINGENE LLC. All Rights Reserved.
- Terms of service • Privacy Policy
- Photoshop ® is registered trademark of Adobe Inc.
- Latest release build:
2.8.644