Guide
The Guide tool helps you create screen-wide vertical and horizontal guides that work per monitor. These guides can be moved, locked in place and distributed vertically and horizontally.
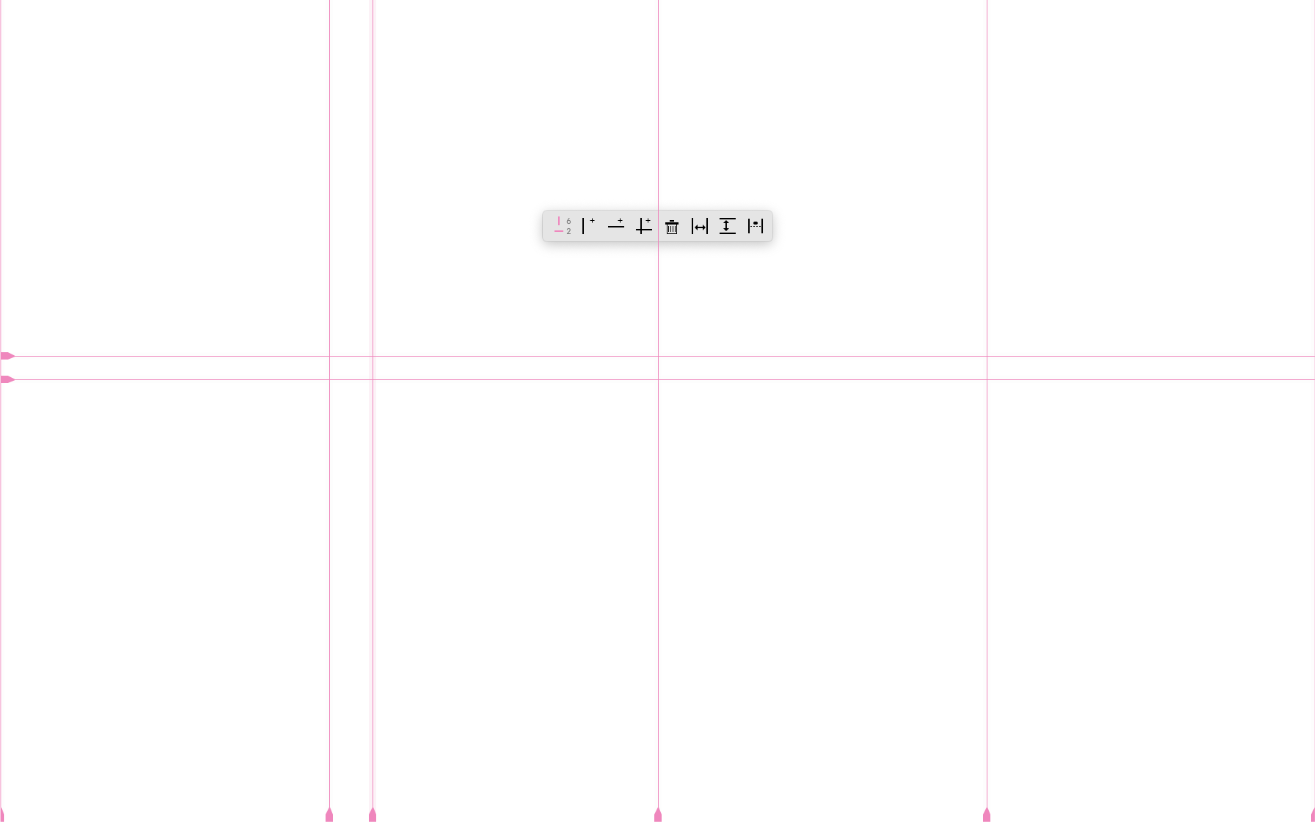
Table of Contents
- Creating guides
- Deleting guides
- Guide Panel
- Selections
- Moving guides
- Snapping guides
- Locking guides
- Distribution
- Distance between guides
- Inactive State
Creating guides
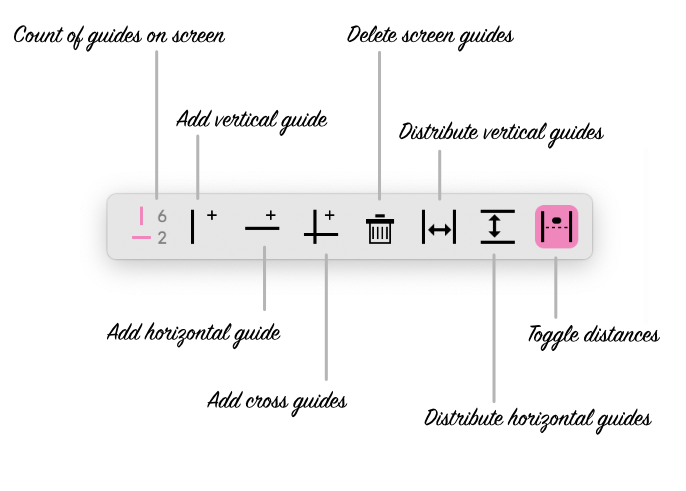
The simplest way to create guides is to use the Guide Panel. It has clear buttons for adding vertical, horizontal and cross-guides. The guides are added depending on the screen on which the Guide Panel is present.
There is also a faster way with keyboard shortcuts. Move your mouse to the required screen and use the following shortcuts:
Spaceto add a vertical guideOptionSpaceto add a horizontal guide
Make sure to keep your keyboard focus on the Guide tool to apply the shortcuts. You can switch between tool windows using the standard macOS shortcut:
Command`.
Deleting guides
Deleting a guide first requires you to select it. Once you select a guide, simply by clicking on it, you can hit the Delete or Backspace key
to delete the guide. You can also use the NumPad Clear key to delete the selected guide.
Guide Panel
The Guide Panel is a screen-sensitive panel that allows you to manipulate guides for a particular screen. As you move the panel from screen to screen, you can see the guide counts and settings like Toggle Distances change.
Note that the guide panel cannot be closed and stays open as long as the Guide tool is open.
Using the guide panel is your easiest path to creating guides, distributing them and toggling distances between guides.
Selections
Every guide has a slightly transparent strip along its length to allow selection. Guides can be individually selected by clicking on the guide.
Hold the Shift key while clicking on the guide strip to add to a selection. Use the Command key to toggle the selection state of a guide.

Moving guides
Guides can be moved by dragging on the partially transparent strip along the guide. If you have multiple guides selected, you can hold
the Shift key to drag all of them together.
Selected guides can also be moved by keyboard shortcuts as shown below:
←to move left by 1px→to move right by 1px↑to move up by 1px↓to move down by 1px
Hold the Shift key while pressing the arrow keys to move by 10px.
Snapping guides
When guides are moved with the mouse, you can hold the Shift key while dragging to snap to an edge nearest to the mouse. This works
even when you are moving multiple guides together.
The video below shows the snapping in action.
Locking guides
To prevent any accidental movement on the guide, you can lock it. Locking relies on having one or more guides selected. Once selected,
you can use the L key to toggle locking of the guides.
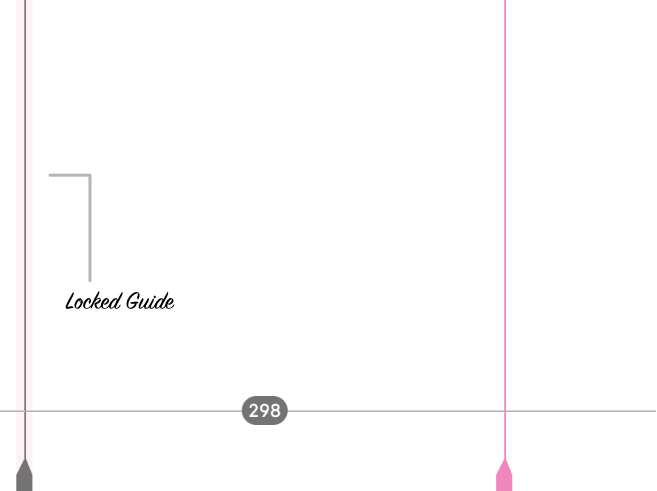
Locked guides have a grey tone to indicate that they are inert and not moveable.
Distribution
To create equal-spaced guides, either vertical or horizontal, you can distribute them on the screen. The easiest way is to use the
distribute buttons on the Guide Panel. Use the ![]() button for distributing vertical guides and the
button for distributing vertical guides and the ![]() button to distribute horizontal guides.
button to distribute horizontal guides.
Distance between guides
To get more precise with the positioning of guides, you can rely on the distances between the guides. Toggle this setting from
the Guide Panel or by using the T shortcut. This setting is applicable on a per-screen basis.

Once turned on, the distance between guides are shown at the bottom for vertical guides and on the left for the horizontal guides.
Inactive State
When QuickLens is not active, the guides on the screen go into inactive state. This allows to explore your own work without any intrusion from QuickLens. You will know if a guide is active or not depending on its color.

If it has the shade of the primary color, you know the Guide tool is active. If it is greyed out and without the partially transparent clickable region, the guides are inactive. The above picture shows the guides in the inactive state.
The guides will become click-through and won't interfere with any of your apps.


- Copyright © 2021 PIXELINGENE LLC. All Rights Reserved.
- Terms of service • Privacy Policy
- Photoshop ® is registered trademark of Adobe Inc.
- Latest release build:
2.8.644